To create a new event select Add Event. There are 3 ways to do this.
1. You can do this my hovering over M.E. Calendar and then selecting Add Event.

Or when you are already in M.E. Calendar (All Events):
2. select Add Event in the sidebar menu on the left-hand side of the screen.
3. Another option is selecting Add Event next to the heading “Events”.

When choosing option 3 please keep in mind that the creation display will look different from option 1 and 2. The steps and tools are the same though. In this guide, we will show the tool when choosing option 1 or 2.
Content #
Fill in the details of the event you would like to create.

By clicking on the black square icon with the white cross in the middle “Add block”, you can enter the text for your event. You will be given the following options:

You can also find this selection by selecting the blue square in the top left corner.

The top bar includes all tools for Blocks, you can choose Patters for the design of the event and choose Media from the Media Library.

Below, you can see all tools sorted by categories. The categories are Text, Media, Design, Widgets, Embeds, and FSE Blocks.
By clicking anywhere in a block, you will be presented with this toolbar:

The first icon is for changing the block to a different type (e.g. Paragraph, List, etc.).
With the second icon you will be able to drag your block around and change the order of the blocks.
The third icon is for moving the blocks either up or down.
The other icons are the typical text editing tools (bold, cursive, insert link, etc.).
By hovering over the area in-between blocks, you will be presented with the blue square to add a block.

This can be helpful when inserting blocks between other blocks. This way, you won’t need to move the block around after creating it.
Event Details #
Once you’re finished with the content, scroll down to the section Event Details. There you can work through all the steps by clicking on the different sections
First, you will have the option of setting the Date and Time of your event.

Next, you can choose to repeat your event. If this doesn’t concern you, just skip this step. The default setting is not repeating the event.

Then, you can create an Hourly Schedule by selecting Add Day. Give it a name and select Add to add the hourly schedule.

If you want to add a location, click on the bar that says “Hide location”. Here you can either choose one of the existing locations or create a new one.

To create a new location, select Insert a new location. Enter the details of your location like the name of the location, the address, etc. Make sure to enter all the data correctly. Once created, the location details can’t be edited.

Add links for your event under Links, if applicable. For example, you could link to a blog post where you announce your event in more detail.
Add an Organizer to your event by clicking on the bar that says “Hide organizer”. Here you can either choose one of the existing organizers or create a new one. When adding an organizer, you can then also add Other Organizers.

If participants have to pay to attend your event, you can include these details under Cost.
The last section for Event Details is called SEO Schema/Event Status. Here you can manage the status of the event.

Booking #
Lastly, you can make use of the Booking section. When making use of this tool, you can manage the bookings for your event through the Event tool on DIGI-FACE. There is a separate page in this guide explaining the Booking tool.

Tool Bar #

Icon explanation from left to right:
- Insert block
- Tools: Editing / Selecting

- Undo
- Redo
- Document overview: List View and Outline

- Search bar
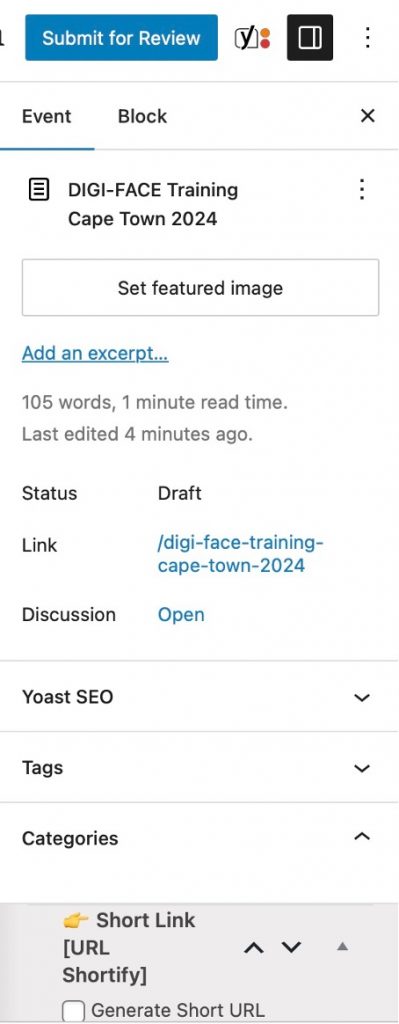
- Save draft: make sure to save the draft of your event often.
- View: in desktop, tablet or mobile mode. Preview in new tab.

- Submit for review
- Yoast SEO: SEO analysis
- Settings

Here you can add an image to your event by selecting “set featured image”
- Options

Make sure to select Submit for Review again in the window that now pops up. Or if you want to make further changes, select Cancel.

Please take note that your event will then be reviewed by an admin of DIGI-FACE to guarantee quality standards on the platform.


